It has been raining non stop for a month now. OK, maybe not non stop, but pretty close. We get one nice day and then BAM! five days of rain. I am so over it, I just want some sun. I want to play outside, go swimming, and eat popsicles. One a positive note, (I am trying to be more positive lately) this incessant rain has forced me to clean up the house, move things around, clean out, donate, and get rid of clutter. It also finally gave me no excuse not to find out how to make hand towels into bibs. My friend had her little girl wearing one at M's birthday party and I again thought how I need to get more made. These aren't new, they have been around forever, but since I finally figured out how to make them, I thought I would share. If you know your way around a sewing machine, these babies will take you about 5 minutes. For you non-sewers out there, it may take you a few minutes longer, or you can just cheat like I did, I will explain below.
A couple months ago a nice neighbor brought me this fun bib to church for my sweet babe. I put it on baby M and I was in love! He couldn't take it off, which is what happens with most bibs, and it covered him so well that not a drop of food got on his clothes. Since that never happens I knew I had to make a few more.

After a fruitful IKEA trip I found some
super cute towels for my bibs. I will admit, I splurged. I usually hunt around, find the deal, and love getting something super cute for cheap. This time I just went for the cute, honestly, I didn't have time to hunt for the deal. Splurging ever now and again is OK right? We all do it, or am I alone? Don't worry I saved money on other things, and I stayed within my budget.
I gathered my supplies. I used the blue one as my pattern and I was lucky enough that my Mother-in-law already had some
white ribbing, woo woo!

You take your ribbing fold it in half and measure your baby's head. You want to stretch it a little bit since you will be stretching the bib over the head to put it on your babe.

Hand towel size is the perfect size for these bibs, I decided to put the neck line 3/4 of the way over, giving more fabric to the front of the bib.

Fold your towel in half and cut a small circle. Cut it small, a little at a time, constantly trying it on your baby. You DO NOT want to cut it too big, otherwise it won't work with your ribbing and won't fit as well. Cut a little, try it on, cut a little, try it on, until it just barely fits over your baby's head. If your baby is anything like mine, they will absolutely DETEST this process, and try to crawl away from you as fast as possible when they see you with that striped towel.

Once you have your hole cut out, you just sew in the ribbing, with it still folded in half. Just stich around the ribbing and the towel and it will turn out something like this....

Confession time, you all know I don't sew, this last part I did not do myself. My Mother-in-law was kind enough to sew the ribbing in for me. Aren't I lucky to have such a nice MIL? It turned out perfect and I love them! Since I splurged, I was only able to make 2, I would like a bunch more. Now I will be on the look out for some bargain ones.
Speaking of my fruitful IKEA trip, I CANNOT wait to show you what else we got. It is amazing, are you intrigued yet?


 After a fruitful IKEA trip I found some super cute towels for my bibs. I will admit, I splurged. I usually hunt around, find the deal, and love getting something super cute for cheap. This time I just went for the cute, honestly, I didn't have time to hunt for the deal. Splurging ever now and again is OK right? We all do it, or am I alone? Don't worry I saved money on other things, and I stayed within my budget.
 You take your ribbing fold it in half and measure your baby's head. You want to stretch it a little bit since you will be stretching the bib over the head to put it on your babe.
 Hand towel size is the perfect size for these bibs, I decided to put the neck line 3/4 of the way over, giving more fabric to the front of the bib.
 Fold your towel in half and cut a small circle. Cut it small, a little at a time, constantly trying it on your baby. You DO NOT want to cut it too big, otherwise it won't work with your ribbing and won't fit as well. Cut a little, try it on, cut a little, try it on, until it just barely fits over your baby's head. If your baby is anything like mine, they will absolutely DETEST this process, and try to crawl away from you as fast as possible when they see you with that striped towel.
  Once you have your hole cut out, you just sew in the ribbing, with it still folded in half. Just stich around the ribbing and the towel and it will turn out something like this....
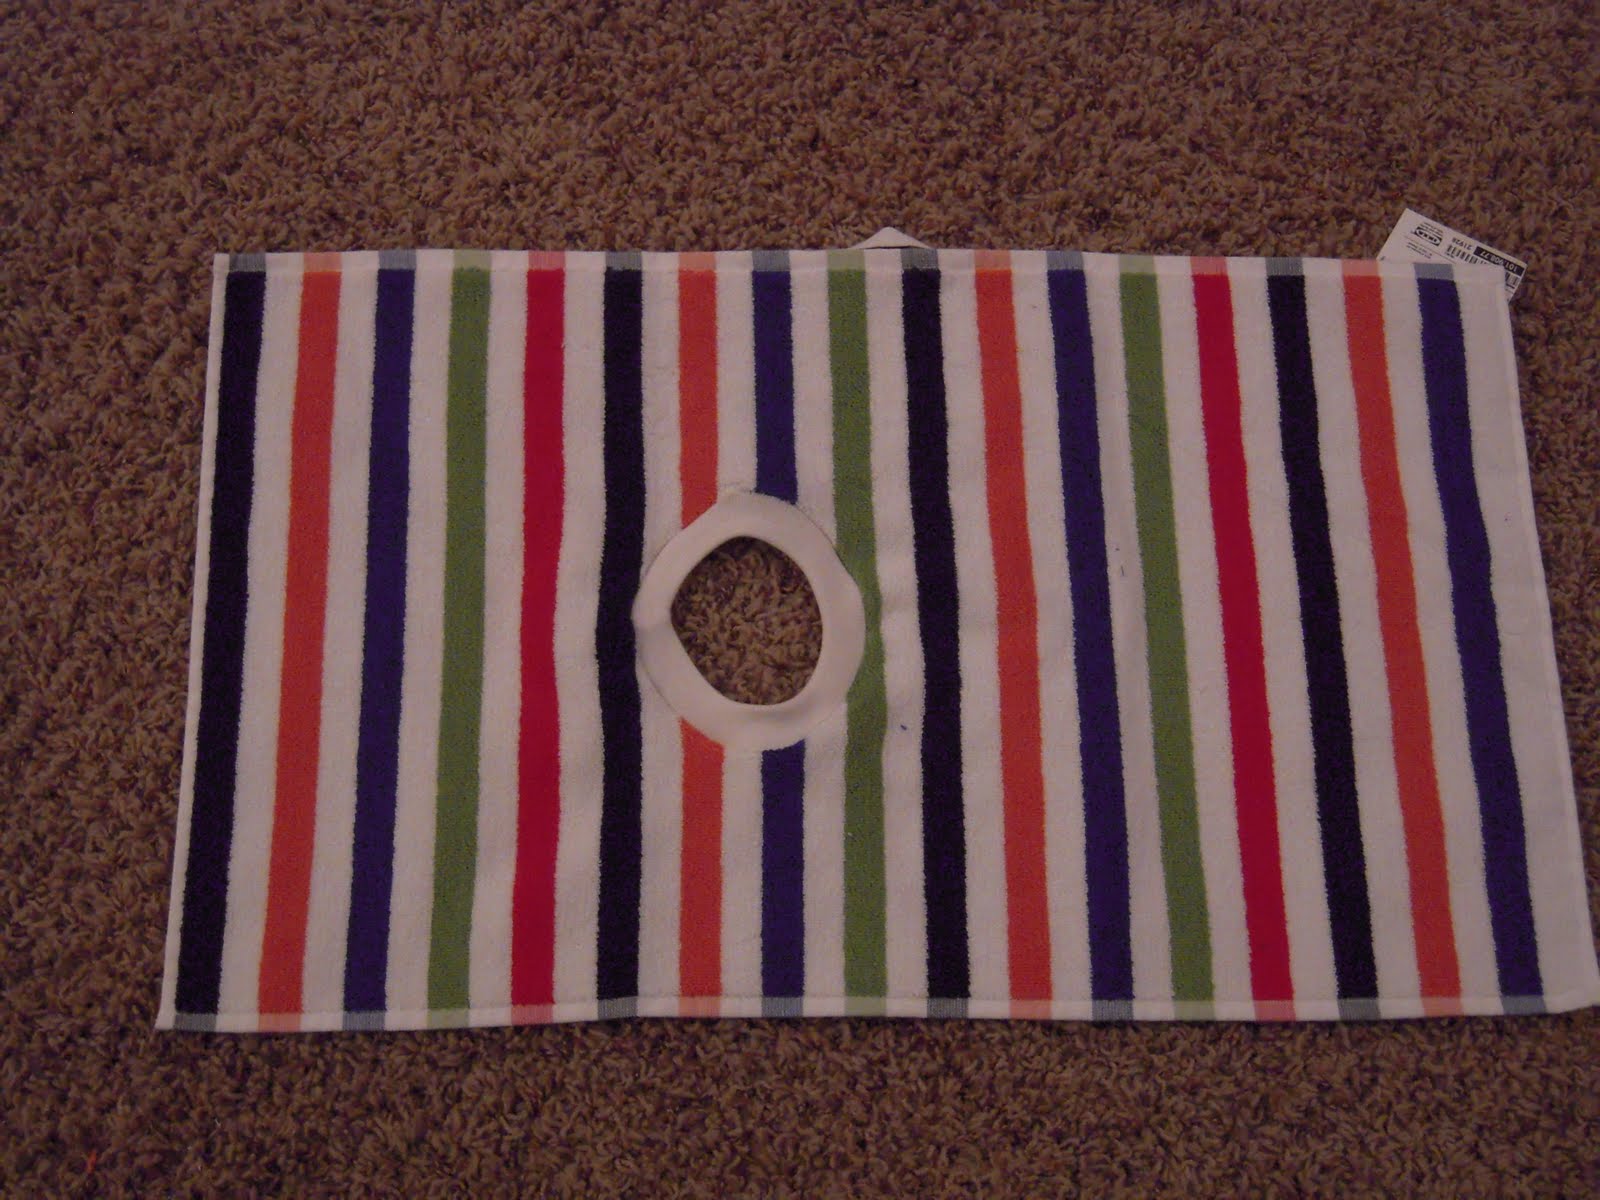 Confession time, you all know I don't sew, this last part I did not do myself. My Mother-in-law was kind enough to sew the ribbing in for me. Aren't I lucky to have such a nice MIL? It turned out perfect and I love them! Since I splurged, I was only able to make 2, I would like a bunch more. Now I will be on the look out for some bargain ones.


