Showing posts with label Kids. Show all posts

A Very Hungry Birthday!

Saturday was my son's second birthday party and he had a blast!  I must admit throwing a party while 36 weeks pregnant wore me right out!  Even though we just invited family, my husband and I have very large families, so there were quite a bit of people there.  We pretty much DIY'd everything and it all turned out great!

For the food we ate the same things the caterpillar did in the book, sausages (lil' smokies), a leaf (spinach salad), strawberries, watermelon, apples, swiss cheese, salami, and pickles.  Sounds kind of like a weird combo, but it was really good.  We had lemon water also.


I used Photoshop to make up food cards.


My husband and I tag teamed the cake.  He is the artistic one, so he did all the sculpting and the fondant.  One of his co-workers made the fondant for another cake and gave us her extra, super nice!  I made home made funfetti cupcakes using this recipe.  SO GOOD.
I used my Grandma's home made butter cream frosting recipe for the icing, I think it turned out cute!
 A friend had given me a caterpillar cupcake stand, he was fun!
A few months back at Target they were clearancing out Very Hungry Caterpillar plates, napkins, and cups, I think they were like $.50-$.75 per pack, score!

I made a fun banner using my Silhouette.
 We made a balloon caterpillar, all the kids got a kick out of it!
 We made fringey streamers for decor, cheap and cute! I also used this fun washi tape to hang them.


As the kids arrived we had them color a large caterpillar mural.  My husband printed it off at work, and we used washable crayons of course!  Here is the before.....
 And the after....
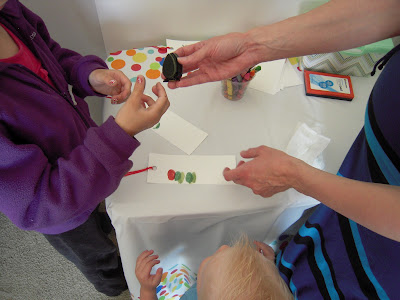
We had everyone make caterpillar bookmarks.  I got the idea from this cute blog.


I was trying to think of 2 year old friendly games to play and came up with this "Feed The Very Hungry Caterpillar" game.  We bought a giant poster board and used our projector to draw the images onto it.  We colored it in with markers.  I used some of our play food that he ate in the book to "feed him".  My son LOVED it, and so did the other kids.

For the favors I was out of ideas, when I saw this cute idea on Pinterest for Butterfly snack packs. (My Pinterest link doesn't have the original source, sorry!)  My son's favorite treat is Marshmallows, I thought the fruit ones would be nice and colorful and had forgot how yummy they are!  I also did Goldfish crackers for the younger kids.  I paired them up with some Very Hungry Caterpillar stickers that were also on clearance at Target.
Though I was absolutely exhausted by the end, it was worth it.  My cute boy has been saying "Happy Birthday Party" ever since!

Tidy Tips: Storing and Organizing Play Food

I have been a neglectful blogger lately, but in my defense we moved and I am 7 months pregnant, so yeah....  I have lots of great things coming, slowly, but surely, I have to get my husband graduated this April though!

My son has been way into birthdays lately.  Lots of family members have had birthdays and he really digs the birthday song and blowing out the candles.  I am glad he is into it since he will be 2 at the end of April.  Where did the time go!?

The other day while shopping at IKEA, I saw their play food and HAD to get the birthday cake.  Then the other food was way too cute to resist, so we ended up getting it all and he has been having so much fun with it!  We have a daily birthday party now, it is too cute.

 Once I got the food home, I wasn't sure how to organize it.  We don't have a play kitchen (yet...I am having a girl, I am sure we will soon enough!), and I didn't like this....

 I started thinking what the best way to organize play food would be.  I had 2 thoughts.  First, how do I store real food?  Second, I have an over abundance of Tupperware and you know how I love to use it for other things, here and here.

The solution was simple.  Here is the result.....
Before....
After....

 So much nicer!  All neatly put away in its home.
How do you store play food?

Blueberry Oatmeal cookies

Happy President's Day! I LOVE Monday Holidays, don't you? One more day to sleep-in, and enjoy the kiddos being home. When my kids are out of school, we usually bake something fun. Unfortunately, I haven't been to the grocery store all week, so we needed to bake something with the ingredients we had on hand.


Cue...Oatmeal Cookie Recipe...

1 Cup Shortening
3/4 cup granulated sugar
3/4 cup brown sugar, packed
2 eggs
1 tsp. vanilla
1 1/2 cups flour, scooped and leveled
1/2 tsp. salt
1 tsp. soda
1 tsp. hot water
1 1/2 Cups quick rolled oats ( I substituted blueberry flavor oats here)

Directions:
Cream shortening, add sugars and cream until fluffy. Beat in eggs and vanilla:


Add flour and salt, then add soda that's been dissolved in hot water; blend. Stir in (blueberry)rolled oats:

Drop by teaspoonfuls onto parchment lined cookie sheet/ungreased cookie sheet about 1.5 inches apart. Bake for 10 minutes or until barely browned and still a little puffy.

Remove to wire rack to cool.


These cookies were so simple to make, and yummy! Crispy-ish on the outside, chewy on the inside.

Homemade Play Dough

My husband took an internship this summer, and as amazing of an experience it has been, it has left us with no money. Since we are super broke this year, a lot of our friends and family will be getting handmade gifts. Play Dough is one that is fun to give cousins and it is just all around fun to make. My son really enjoyed the entire process, though when it came to actually playing with the play dough, he was a little confused. 19 months may be still a little young, oh well!


I found some fun Tupperware to put it in, I think a bow and a gift tag will make it extra cute. I am going to be using these gift tags this year, thanks Cierra!
Homemade Play Dough
(This recipe is from my sister, Shauna)
2 cups flour
1 cup salt
4 tsp cream of tartar
2 cups water
2 TBSP oil (I used Canola)
Food coloring (optional)
Spice for scent (optional also, I didn't use any, I really like the salty smell, I know I am a weirdo.)

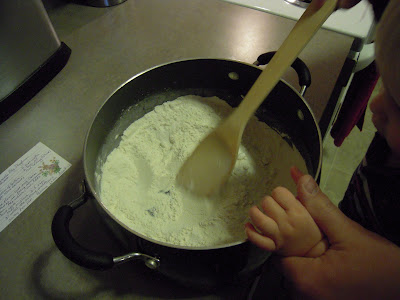
Mix flour, salt, and cream of tartar in a heavy aluminum pan. Add water, oil, color, and spice.

Heat on the stove 3 to 5 minutes or until the mixture pulls away from the pan. Remove from heat and knead immediately or put it in a bread mixer to knead. (Personally, I love kneading it by hand, it is VERY warm, but I like it.)

Store in and airtight container in the refrigerator. It will keep for several months.

Are you doing hand made gifts this year? What are you making? I have another few ideas to make, hopefully I will get them done and posted soon!

DIY Summer Movie Night

I.LOVE.SUMMER. I love the heat, the outdoors, and all of the fun! Friday was the epitome of a great summer day. Swimming in the afternoon, dippy dogs for dinner, and an outdoor movie, it was too fun. My in laws own the lot next to them and have a sport court with a chain link fence. I had an idea that this would be perfect for an outdoor movie, but didn't know how to make it work, I didn't own a projector, and they are expensive. Luckily I married an amazing man, who is frugal, and with our powers combined, we made an amazing, inexpensive outdoor movie night.

This is possible for anyone, even if you don't have an empty lot, you could do it in your backyard or the side of your house. First chore is to find a projector. Since my husband is a student, he spends a considerable amount of time on campus, and has become quite familiar with what campus has to offer. One of the hidden gems on the campus of several Universities is their surplus and salvage. They sell all their "old" supplies at a huge discount since they initially bought it tax exempt. The real trick is patience, at our local University once the products have been on sale for 2 months, they go on DEEP discount. We got a fully functional Dell projector only 5% of its bulb used for SIXTY DOLLARS!!! It is a $1600 projector, you can't find a better deal than that! So the big task at hand was done. Most projectors hook up to a laptop, we used our Xbox, it worked great.

You will need a few extension cords for all of your plugs, my in laws have a bunch they use at Christmas time, with multiple outlets that were perfect. You will also need speakers, but just use whatever you have available. We have a surround sound system that we just packed up and took over, the quality was amazing.

The next task it the screen, originally we were going to buy this cheap sheet from IKEA, but my mother in law happened to have a bolt of white fabric, score! We sewed two pieces together to make our screen. To make the screen easy to set up, we sewed little strips on each corner and hooked it to carabiners.

The carabiners attached to the chain link fence and we were ready to go!
Here is the set up, the projector, Xbox, and speakers.
Since we had power outside I brought out the popcorn pumper for added fun!

We rented Rango from Redbox, here is my attempt at a picture with the movie going, not so great.
Everyone had a great time, don't forget bug spray!

We have had movie night twice already and plan on having a few more before summer is through!

Summer Activity List

The weather may not think so, but I do, Summer is here! I have been working on invitations for my parents 50th wedding anniversary in August, and that is about all I have accomplished this week. I came across this fabulous list while pinning, and had to share it with you all. It is from Counting On Me. It is a great list I hope to do lots of these activities this summer. Enjoy and happy weekend!!

Healthy Homemade Popsicles

Yesterday it FINALLY felt like Summer, pretty much we just skipped Spring all together and went straight to Summer. It was 87 degrees, it hasn't been 87 degrees, since October 3, 2010, yeah people that is 8 months. Usually in the Spring we get some nice 70 degree days, not this year, lots of rain, and the temperature pretty much hung out in the 60's. WHEW, enough of that rant, the real reason I am telling you all of this is because Summer time brings a whole new batch of fun recipes! I have been wanting to try this one for awhile, the 87 degree day finally made me get around to it! I picked up some Popsicle molds from IKEA for $1.49, they go fast at my store, I was only able to get one set, I will have to scope them out early next year to get another set.


I found this yummy recipe in Wholesome Meals for Babies and Toddlers, it said it serves 4, but I am not sure how they are calculating that. It made about 12 Popsicles.

Strawberry Yogurt Pops

2 1/2 cups fresh strawberries, hulled and sliced
generous 1 1/4 cups thick plain yogurt
3 TBSP runny honey
a few drops of vanilla extract

Put all ingredients in the blender or food processor and blend until smooth. Pour the mixture into ice pop molds and freeze until solid.

This recipe is super simple, here are my notes. First, since it is a little early on strawberry season, mine were a tiny bit tart, we like sour stuff around my house, so we were fine with it, but if you want them a little sweeter, you may want to wait until further into the season. Next, because we like things more on the sour side, I chose no sugar added plain Greek yogurt. I try to use Greek in any recipe that calls for yogurt because it is so much healthier. It is tart though, so to get members of my family to eat it plain I have to mix in fruit or grams. Lastly, I used local honey. Local honey is supposed to help combat allergies, and this house is full of allergies. I don't think you can get more local than my honey, it is from my sister in law's bees. I froze them over night, so I may or may not have had one this morning for breakfast, but they are healthy, so I don't feel so bad. :) If you have a hard time getting them out of the molds, just run them under cold water for about 5 seconds, they came right out.

In the recipes' notes it says you can use any fresh fruit you have in season. I am excited to try lots, blackberries, peaches, raspberries, I can't wait for the Farmer's Market to start on Saturday!! If you don't have molds, you can also just whip this up as a smoothie, it is quite runny though, so in that case, you may want to add more yogurt.

Do you have any fabulous Summer recipes? Please share!