Showing posts with label Christmas. Show all posts

Stocking Stuffer Ideas For Preschoolers and Toddlers


I'm on a roll, posting once a year, woo woo!  It's that time of year again, so I thought I would share some things I am thinking of using as stocking stuffers for my kids.  Once again I have a son and a daughter, so some of these things are a little gender specific.  I love these ages, it seems so easy to buy gifts for, because they are excited about EVERYTHING! I must warn you that my kids are really into art right now and we had a recent trip to IKEA, sorry!

Preschool Boy:
(Age 3 1/2)

(These the the BEST, especially for night time potty runs!)
03:  Flossers
04:  Magic Wash Rag (I buy them at Dollar Tree)
05:  Slippers 
09:  Straws
10:  Card Game

Toddler Girl:
(Age 19 months)

01:  Melissa & Doug Color Flap Mirror
03:  Bath Books (Dollar spot at Target or Dollar Tree usually has them)
04:  Small Stuffed Animal
07:  Jumbo Crayons (They say they're harder to break, I hope so!)
08:  Panties (I'm hopeful!)
09:  Toothbrush
10:  Detangling Brush (My friend Livia just did a post about these, I'm excited!)

We will throw in a couple cutie oranges and a candy cane and call it good!  Some of these won't end up in the stockings and will probably just get wrapped as a gift.  What are some of your favorite stocking stuffers for these ages?

Stocking stuffer ideas for babies and toddlers.

I bought these stockings years and years ago, when I was single.  Why I bought such a random number, 3, I dunno.  I have to get some new ones this year, since we are now a family of 4!

When it comes to holiday shopping, I spread mine out for a couple months, and then I like to be completely done by black friday weekend.  I like to be done, so that during the Christmas season, I can sit back, relax, serve others, and enjoy the season.  This also means I have *most* of my stocking stuffer presents already done too.  I have to pick up little clementines right before the holiday, so they obviously don't go bad.  This year since I have a baby and a toddler I started thinking of fun things for Santa to put in their stockings.  Once I started thinking, I got a pretty good list going, so I thought I would share it.  Obviously, I am not going to put all of these things in them, that would be some big stockings!

Since I have a boy and a girl, these are specific to them, but some of these items you could find for either gender.

Toddler Boy:
Toothbrush
Toothpaste
Bubblebath
Travel size loofah (I have found these are perfect for babies and toddlers!)
Character Bandaids
Matchbox car
Disney movie (Cars, Incredibles, etc.)
Mini Magna Doodle
Kids tape measure (My son LOVES playing with Daddy's.)
Glow sticks for bath time
Roll of pennies (He will love putting them in his piggy bank one by one!)
Camelbak water bottle
Bath Boats
Mini boxes of raisins
Small bag of pistachios (Weird, but my 2 1/2 year old LOVES them.)
Clementines

Baby Girl:
Toothbrush
Travel size loofah
Baby Bee wash
Piggy Paint Nail Polish (I like to paint her toes!)
Soft headband
Mermaid rattle (they have pirates too!)
Sili squeeze or baby food pack (I really like the sili squeeze my sister in law gave me!!)
Fisher Price Disney Princesses
Camelbak water bottle (I found out my 5 month old can drink out of it when she grabbed mine!)
Teether
Disney movie (I know she is way too young, but better start the collection now!)
Tights
Trumpette Socks (These actually stay on!)
Board Book
Sinucleanse kids mist

What are your favorite stocking stuffers for babies or toddlers??

Tidy Tips: Sealing Envelopes

I know we have said it before, but this poor blog has been neglected.  In my defense, I am pregnant and have been SOOO sick.  That brings me to my next point.  Because I have been sick and tired I am just now sending out my Christmas cards.  At least they will get there before Christmas!  Another thing with being pregnant is weird smells and tastes are out of the question, so there is NO WAY I was going to lick all those envelopes to seal them.  I got a little creative instead.

 No, I am not going to do my make up while sealing envelopes and this glass of water is not for drinking.  You take the make up brush, dip it in the water, and use it to seal your envelopes.


 Voila!  A nicely sealed envelope with minty fresh breath!
Happy Holidays!

Christmas Crafts

This poor little blog has been neglected lately, sad but true. Since we were much more on top of things last year, I thought I would link up some of our Christmas posts from last year.

It is only December 3rd, so you still have time for an advent calendar!!
Here is a cute gingerbread one....
Or the classic paper chain.
If you are needing some decor, here is quick and easy Christmas framed art.
Faux gingerbread cookies.
And snowman spoons. All of these crafts are super inexpensive, most using dollar store supplies.
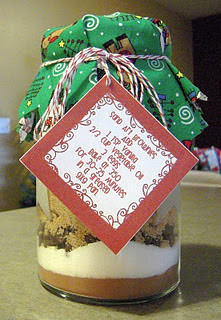
If you need some neighbor gift ideas here are a few. Sand art brownies.
Homemade candied almonds.
Or, Have a "grate" Christmas!
Hopefully we will have more ideas to show soon!

Homemade Play Dough

My husband took an internship this summer, and as amazing of an experience it has been, it has left us with no money. Since we are super broke this year, a lot of our friends and family will be getting handmade gifts. Play Dough is one that is fun to give cousins and it is just all around fun to make. My son really enjoyed the entire process, though when it came to actually playing with the play dough, he was a little confused. 19 months may be still a little young, oh well!


I found some fun Tupperware to put it in, I think a bow and a gift tag will make it extra cute. I am going to be using these gift tags this year, thanks Cierra!
Homemade Play Dough
(This recipe is from my sister, Shauna)
2 cups flour
1 cup salt
4 tsp cream of tartar
2 cups water
2 TBSP oil (I used Canola)
Food coloring (optional)
Spice for scent (optional also, I didn't use any, I really like the salty smell, I know I am a weirdo.)

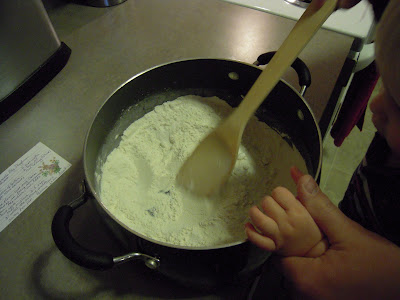
Mix flour, salt, and cream of tartar in a heavy aluminum pan. Add water, oil, color, and spice.

Heat on the stove 3 to 5 minutes or until the mixture pulls away from the pan. Remove from heat and knead immediately or put it in a bread mixer to knead. (Personally, I love kneading it by hand, it is VERY warm, but I like it.)

Store in and airtight container in the refrigerator. It will keep for several months.

Are you doing hand made gifts this year? What are you making? I have another few ideas to make, hopefully I will get them done and posted soon!

Merry Christmas!!

Wishing you a happy holidays from the lil birds!! We will be spending the rest of the week with our families and will see you next week! Hope you holiday is fabulous!!

One Dollar Wednesday...my snowman spoons

I'm late in posting this morning, but I'm late at everything this time of year. So much to do, so little time!

I found these great vintage spoons at a thrift store... they were 4/$1.00, so I thought they would be perfect to use for One Dollar Wednesday. Now, I am not suggesting that spoons bought at thrift stores are good for eating from...but they are perfect for crafting.


Out to the Spray Paint Place for a coat of metal primer, and a quick coat of "snow" white.


Add an orange carrot nose with a permanent marker...


and additional details with a fine point Sharpie.

Cut four rectangles from scrap fabric,


and fold up the very end of the fabric to form a little rim for the hat.


Attach to the spoon with a dot of glue.


Complete the hat by gluing it together in the back, and adding a little yarn tie to the top. Now bend back the spoon~ the hardest part of this entire craft!


Hang the happy little guy on the tree for a season of snowman smiles!

Around the Town Tuesday...featuring Ogden's Christmas Village


We took a trip up to Ogden this past week to visit the Christmas Village. It was my first time there, and it was a really fun experience. The kids LOVED looking into all the little houses to see the unique ways they were decorated, Each one was charming and original, and it was a great Christmas activity to enjoy.


Western Santa....

and little elves hard at work.


Nutcracker collections.


Vintage Christmas, my FAVORITE!


Look there's even a stocking hung just for me...


This past weekend was CRAZY busy for me, because I was sewing Christmas skirts for my girls. It was my first attempt to sew anything "nice", and it was really HARD. It would have been easier if I had used an actual skirt pattern, but I thought I'd wing it. They actually turned out okay, and I got a lot of compliments. Next time I will start WEEKS in advance.


Last Minute Neighbor Gift Idea: Homemade Candied Almonds

Even though I rack my brain and try to make a list of every neighbor/friend I want to give a small holiday goodie to, I still am bound to forget someone. Then my doorbell rings and it is my cute neighbor with a treat for me and I am scrambling to find something to give in return. It always happens this last week before Christmas too, so whip up a batch of these homemade candied almonds to have on hand for a quick exchange! I actually made these this year for some of my neighbors who have to have "gluten free" due to allergies. One of the BEST parts about making these is the smell, it will make your entire house smell like Christmas with the yummy cinnamon smell. These are way cheaper than the ones you buy in the mall, I get the 3 pound bag of almonds at Costco, I think it is around $10. This recipe requires a lot of stirring, I recruited my strong husband to help.

I got this recipe from allrecipes.com, I have included a TON of pictures, I wish I would have these, I had to learn how to do this recipe the hard way, by ruining a batch, boo. If you just keep stirring this recipe is SIMPLE.

Candied Almonds

1/2 Cup water
1 Cup white sugar
1 TSBP ground cinnamon
2 Cups whole raw almonds

Combine the water, sugar, and cinnamon in a saucepan over medium heat; bring to a boil; add almonds. Cook and stir the mixture until the liquid evaporates and leaves a syrup like coating on the almonds. Pour the almonds onto a baking sheet, lined with wax paper. Separate the almonds using a fork. Allow to cool for 15 minutes.

****The "syrup like coating" is misleading, keep stirring, you want them to be dry and have a crystallized coating. Below is the recipe in photos.

Mix your ingredients and bring to a boil....
Add the almonds and keep stirring...
It will start to thicken a little, keep stirring....
More stirring....
This is what I thought is a syrup like coating would be, DO NOT STOP HERE, KEEP STIRRING...
The sugar will start to stick to the bottom of the pan, that is OK, you're not done yet, even when it looks like this, KEEP STIRRING....

When your almonds look like this, you are done!
Pour them onto your baking sheet and let them cool....

I had some decorating bags that I decided to put them in....


I think they worked well, I made sure to tie a bow over the logo, so you don't see it. I found some cute cone ornaments I had bought at IKEA last year to put them in.

I think they turned out cute, and they were yummy!!
Merry Christmas, 5 days left!!