Showing posts with label Recipes. Show all posts

Homemade Play Dough

My husband took an internship this summer, and as amazing of an experience it has been, it has left us with no money. Since we are super broke this year, a lot of our friends and family will be getting handmade gifts. Play Dough is one that is fun to give cousins and it is just all around fun to make. My son really enjoyed the entire process, though when it came to actually playing with the play dough, he was a little confused. 19 months may be still a little young, oh well!


I found some fun Tupperware to put it in, I think a bow and a gift tag will make it extra cute. I am going to be using these gift tags this year, thanks Cierra!
Homemade Play Dough
(This recipe is from my sister, Shauna)
2 cups flour
1 cup salt
4 tsp cream of tartar
2 cups water
2 TBSP oil (I used Canola)
Food coloring (optional)
Spice for scent (optional also, I didn't use any, I really like the salty smell, I know I am a weirdo.)

Mix flour, salt, and cream of tartar in a heavy aluminum pan. Add water, oil, color, and spice.

Heat on the stove 3 to 5 minutes or until the mixture pulls away from the pan. Remove from heat and knead immediately or put it in a bread mixer to knead. (Personally, I love kneading it by hand, it is VERY warm, but I like it.)

Store in and airtight container in the refrigerator. It will keep for several months.

Are you doing hand made gifts this year? What are you making? I have another few ideas to make, hopefully I will get them done and posted soon!

Tidy Tips: Upcycling Bread Bags

Like many of my tidy tips, this is another one of those I learned from my Mother. Speaking of my Mother, last weekend I threw their Golden Anniversary party, and everyone said it turned out wonderful! I thought everything went well, as soon as I have pictures back I will share them! Anyway, for as long as I can remember my Mother has saved her bread bags. They get the most use out of them around Thanksgiving and Christmas. That is when my Mother makes her famous rolls, she always makes tons extra, because we all love them so much, and then sends us home with an upcycled bread bag full of delicious rolls.


Lately, finances have been SUPER tight around here, so I have been using my bread bags for lots of things, for example, I buy a big block of cheese at Costco, then put it in a bread bag with a bag clip to keep it fresh. My favorite use lately though, has been to use them for recipes. One of my favorite treats is Muddy Buddies, the recipe tells you to put the coated cereal into a gallon bag and shake it up with the powdered sugar. I just can't get on board with buying gallon bags, I can do sandwich and snack, but I can't justify the money or waste buying more bags. SO, I use my bread bags, it works PERFECT. I have also used them to make sweet potato fries, I found that recipe HERE via Pinterest.


Just so you know I am telling the truth, here is my example. Depending on what mood I am in, I will either just shake out the bread crumbs or sometimes I will wash the inside of the bread bags with hot soapy water. Today, it was the shake out method. Here is my bread bag, ready to go.


For the buddies, I do a cup of powdered sugar on the bottom of the bag, and the other cup on the top, it helps to evenly distribute a little better.

The key is to leave a bit of air in the bag to shake everything around, shake it up good! My son likes to help me with this part, even at 15 months, he does a good job!

Here is the proof, perfect muddy buddies.

These ones are actually lemon buddies, YUM! I found this recipe via Pinterest as well, I am addicted it is true! Now I LOVE LOVE LOVE lemon, I am talking if my dentist hadn't forbid me from eating lemons, I would eat them like an orange, I love them that much. That said, this recipe needed a tiny bit more lemon than the recipe called for. So to remedy my lemon addiction, I added a little bit more lemon juice on the top of the buddies after they were done. These are an amazing, yummy summer time treat! Don't worry I still love the good ol' regular ones too. You can find the lemon buddy recipe in its entirety HERE.


Happy Upcycling!

Dippy Dogs

Do you believe it, between all of the fun things we have been doing, I finally managed to get a post up! Woo hoo! Last month when I visited my parents in Southern Utah my Mom gave me this....

As my parents get older my Mom is cooking less and isn't needing all of her kitchen appliances anymore. I received the fryer and her popcorn popper, both of which I was super stoked about. I have to be careful, fried food isn't the healthiest, but I have some theories regarding it. First- I try to have good eating habits 90% of the time, the last 10% is reserved for fun, fatty, unhealthy food, because you can't miss out on life. Second- If you're going to have fried food, make it yourself. You know what is going into it, and no matter what it tends to be slightly healthier.

The reason my Mom actually gave me her fryer was because we were talking about must have summer treats. I was talking about feeling guilty for buying Otter Pops, and my Mom told me what I mentioned above. She was right, what is summer without Otter Pops, snow cones, and corn dogs. I was aching for a good home made corn dog, I am sorry, but the ones you buy in the freezer, YUCK! I am talking the good corn dogs, the kind you get on the pier in Santa Cruz, made fresh juicy corn dogs. Growing up, my Mom made everything from scratch, and corn dogs were no exception. Naturally, she had the recipe for me, we made them for dinner last night, and my husband loved them. He loved them so much he even talked about them on Facebook!

Dippy Dogs
1 1/2 Cup pancake flour.
(My Mom doesn't buy special flours, so here is how to make pancake flour: 1 1/4 C flour, 2 TBSP sugar, 1 TBSP baking powder, and 1/2 TSP salt. If you are using this instead of pancake flour, just use this formula instead of the 1 1/2 C, does that make sense? Use this mixture in ADDITION to the rest of the ingredients in this recipe.)
1 TSP sugar
1 1/2 Cup milk (I would actually recommend probably 1 1/4 Cup, I haven't tried it yet, but my batter was a little thin, I would like it thicker.)
2/3 Cup corn meal
1 TSP salt
Around 15 wieners
Mix ingredients until you have a smooth batter. The secret of making the batter stick to the wieners is to heat the wieners in hot water then remove from water and dry thoroughly with a cloth. Insert sticks into wieners, dip in batter, and fry in hot, deep fat. (I used Canola Oil, it worked perfectly.)

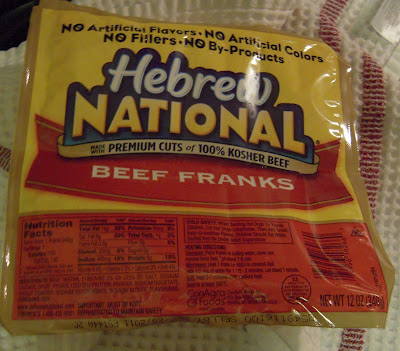
If you are going to make your own corn dogs, go all out, get the good stuff, none of the mystery meat. Get the 100% all beef franks. We LOVE the Hebrew National.
I used my kitchen aid mixer to mix the batter, worked like a charm.

I didn't realize until we started that we didn't have much oil. To solve that problem, I cut the franks in half, so they were mini dippy dogs.
I brought water to a boil and threw them in, sticks and all, for about 1 to 2 minutes. I dried them thoroughly with a dish towel.
Soaked them in the batter, nice and thick.
I placed them in the fryer using silicone tongs. Make sure you have silicone so they don't melt. Mine are these from IKEA. I set the oil on the 350 degree setting. It was perfect. They sat in there for about 3-4 minutes, just until they were golden brown. I would assume you could try this in a saucepan with oil, if anyone attempts it, please let me know how it goes!
Here are the finished dogs, they were sooooo good. I served them with fry sauce, I also like them with ketchup or mustard.
Nothing says summer like a good corn dog! What do you think!?!

The BEST Banana Bread

In the summertime I generally don't do much baking. It is too hot to crank up the oven and have more heat in the house. There are rare exceptions though, like when you have a few ripe bananas, and you are going out of town for the weekend. That is where my favorite banana bread recipe comes in. I got this recipe from my friend Janey, I knew I would love it when I read that it has sour cream in it. Sour cream is one of my favorite condiments, dressings, mixed with salsa, oh how I love it! I think it is what makes the bread so moist.

Banana Bread

1 & 2/3 Cup all purpose flour
1 TSP baking soda
1/4 tsp salt
1 Cup plus 2 TBSP sugar
2 eggs
1/3 Cup oil
3 & 1/2 bananas, very ripe, mashed
2 TBSP creme fraiche or sour cream
1 TSP vanilla extract


Set the oven to 350, line the bottom of a loaf pan with parchment paper. Sift together the flour, soda, cinnamon, and salt; set aside. Beat the sugar and the eggs together with a whisk until light and fluffy, about 10 minutes. (I cheat and let my kitchen aid mixer do the work.) Drizzle in the oil. Add bananas, cream, and vanilla. Fold in the dry ingredients and add desired nuts. (This is optional, my husband doesn't like nuts, so I skip it.) Pour into lined loaf pan and bake for 45 minutes to an hour. (It usually takes me an hour.)

Enjoy!

Healthy Homemade Popsicles

Yesterday it FINALLY felt like Summer, pretty much we just skipped Spring all together and went straight to Summer. It was 87 degrees, it hasn't been 87 degrees, since October 3, 2010, yeah people that is 8 months. Usually in the Spring we get some nice 70 degree days, not this year, lots of rain, and the temperature pretty much hung out in the 60's. WHEW, enough of that rant, the real reason I am telling you all of this is because Summer time brings a whole new batch of fun recipes! I have been wanting to try this one for awhile, the 87 degree day finally made me get around to it! I picked up some Popsicle molds from IKEA for $1.49, they go fast at my store, I was only able to get one set, I will have to scope them out early next year to get another set.


I found this yummy recipe in Wholesome Meals for Babies and Toddlers, it said it serves 4, but I am not sure how they are calculating that. It made about 12 Popsicles.

Strawberry Yogurt Pops

2 1/2 cups fresh strawberries, hulled and sliced
generous 1 1/4 cups thick plain yogurt
3 TBSP runny honey
a few drops of vanilla extract

Put all ingredients in the blender or food processor and blend until smooth. Pour the mixture into ice pop molds and freeze until solid.

This recipe is super simple, here are my notes. First, since it is a little early on strawberry season, mine were a tiny bit tart, we like sour stuff around my house, so we were fine with it, but if you want them a little sweeter, you may want to wait until further into the season. Next, because we like things more on the sour side, I chose no sugar added plain Greek yogurt. I try to use Greek in any recipe that calls for yogurt because it is so much healthier. It is tart though, so to get members of my family to eat it plain I have to mix in fruit or grams. Lastly, I used local honey. Local honey is supposed to help combat allergies, and this house is full of allergies. I don't think you can get more local than my honey, it is from my sister in law's bees. I froze them over night, so I may or may not have had one this morning for breakfast, but they are healthy, so I don't feel so bad. :) If you have a hard time getting them out of the molds, just run them under cold water for about 5 seconds, they came right out.

In the recipes' notes it says you can use any fresh fruit you have in season. I am excited to try lots, blackberries, peaches, raspberries, I can't wait for the Farmer's Market to start on Saturday!! If you don't have molds, you can also just whip this up as a smoothie, it is quite runny though, so in that case, you may want to add more yogurt.

Do you have any fabulous Summer recipes? Please share!

Mouthwatering Chocolate Chip Cookies...

After the birthday party, I had many requests for my chocolate chip cookie recipe. It has taken me awhile, but finally I am posting it! It is another one of those recipes that has been in my family for years. The only problem with this recipe is that it makes 6 dozen. So, I don't advise making them, unless you are planning on giving half a way, which is usually what I do. If you don't give them away, they are so yummy you will eat all 6 dozen and gain weight! You could attempt to half the recipe, but I have found in baking that doesn't work so well, it alters the chemistry and they don't quite taste the same. The ginger snap recipe also got a lot of inquires, you can find that recipe here.

Chocolate Chip Cookies
Bake in a 350 degree preheated oven for 12-13 minutes. Makes 6 dozen cookies.
-3 cubes butter or margarine
-3 large eggs
-2 TBSP vanilla extract
-2 cups chocolate chips
-1 1/2 cups sugar
-1 1/2 cups brown sugar
-6 cups flour
-1 3/4 TSP baking soda
-1 3/4 baking powder

Cream the sugars and the butter until smooth and a light color. (This part is key, really make sure they are blended, it makes the cookies.) Add eggs and vanilla extract and mix together. Add dry ingredients and mix. Add chocolate chips and mix a final time. Drop spoonfuls or use a cookie scoop and scoop onto cookie sheets.

ENJOY!

The BEST chocolate cake recipe...

It is birthday month at our house, my husband is starting us off with his birthday on Thursday. When I met him, his favorite cake was carrot cake, I had never had a good recipe for carrot cake until recently I got one from my Mom. I was all set to make him a yummy carrot cake this year and when I told him, he said "No, I want the cockeyed cake." I was surprised a little, but really this cake is THE BEST, it is no wonder it has taken over to become his favorite. I debated whether or not to share this recipe, sometimes I can be a bit of a recipe snob. Only because recently I have shared this recipe and when it got compliments, instead of saying "thanks, I got this amazing recipe from SueAnn," all I heard was "thanks." As in them taking ownership of the recipe. I know that is a silly thing to let bug you, but it did bug me. I love a great recipe, but I always make sure to tell it's true source, it is just the right thing to do! I know I am not the original creator of this recipe, but it has been in my family for years, so a simple "thanks I got it from SueAnn", would be nice. ANYWAY, enough of my little rant, here are a couple pictures of the cake from a few months back.

It was a Sunday afternoon and we had agreed to make the cake for my brother in law's birthday. We had planned on bringing it, but we were just going to do a boring decorating job, until I found my pirate cake people with the cake pan. We decided it would be fun to do a pirate cake. Since it was a Sunday, going to the store was out of the questions, so we had to use what we had at home. I think it turned out really well for no planning. A side note is that I have yet to successfully get a rectangular cake out of the cake pan without ruining it. I have tried butter, Pam, shortening and flour, but to no avail. I need to go the parchment paper route, do you have any suggestions?


The "sand" is crushed graham crackers and the boat is a Rice Crispy Treat that we frosted. The rest is my Grandmother's frosting recipe which I will also list below.

Not only is this chocolate cake unbelievably delicious and moist, it contains no eggs, which is perfect for someone allergic to eggs, or great just to let your kids eat the batter without feeling guilty; though I consumed lots of cookie dough as a child and I am fine!

Cockeyed Cake
Bake in a 9x13 pan for 35-40 minutes.
1. Sift together in a bowl:
--3 cups flour
--6 TBSP cocoa
--2 cups sugar
--2 TSP baking soda
--1 TSP salt
2. Make 3 holes in the dry mixture.
3. Into one hole pour 2 TSP vanilla.
4. Into another hole pour 2 TBSP vinegar.
5. Into the last hole pour 3/4 cup cooking oil.
6. Pour 2 cups water over it all.
7. Beat until nearly smooth and you can't see the flour.
8. Pour into pan and bake as above, until a toothpick inserted in the middle comes out clean.

***This recipe also makes good rounded cupcakes. Fill cupcake tins 3/4 full. Makes 30 cupcakes. Bake 20 minutes.

Basic Butter Cream Frosting
4 cups powdered sugar
1/4 TSP salt
1 TSP vanilla
1/4 cup milk
1/3 cup butter softened

Beat until smooth with electric mixer, scraping the bowl often. If too stiff add a little more milk until desired consistency.

Monday Meal: Chicken Enchiladas

I am a big fan of meal planning for oh so many reasons.
01: It saves money, any financial advisor will tell you the less trips you take to the store, the less you will spend.
02: It is healthier. I know what is going in my meals and I can choose to use light sour cream instead of regular.
03: I am a planner by nature, so meal planning is something I enjoy.
I usually start out meal planning on Mondays, I was just writing all my meals on a piece of paper until I saw a cute menu board at make and takes, I made one and I love it. I meal plan and write my grocery list at the same time, so I don't miss anything. I usually work 3 nights a week, so naturally those nights are leftover nights. No matter what I would suggest at least 2 leftover nights a week, so no food is getting wasted. My challenge with meal planning is finding new meals, I get bored quickly and I don't like to repeat a meal for at least 2 weeks. Although, I don't think my husband would mind a bit if we had pizza once a week, but that contradicts the whole healthy goal a bit. I love finding new recipes, but I am a bit picky with them. I like them to be easy, fairly quick, and less ingredients the better. I really enjoy cooking & baking and love to try new recipes. Every now and again I will share a recipe that meets my above mentioned criteria to hopefully add to your meal planning so that you can add something new! If you have any recipes to pass along I would LOVE to hear them! Are you a meal planner? What are your tricks and tips? Here is my favorite recipe for chicken enchiladas. Please ignore my chipped plate, I really need some new dinner wear.
Chicken Enchiladas
Bake at 350 degrees for 30 minutes.
Makes 4 enchiladas.

1 large chicken breast, cooked & shredded
4 flour tortillas
3/4 C shredded cheddar cheese

Mix together the following:
1 can cream of chicken soup (I use the reduced fat and cannot tell a difference in taste.)
2 TBSP Mayo (I use light)
1/3 C sour cream (I use light)
1 TSP dried onion
1/2 TSP garlic powder
3/4 C shredded mozzarella cheese

Mix half of the above mixture with the chicken. Cover a square glass baking dish with about 3 TBSP of the soup mixture. Warm each tortilla for about 10 seconds in the microwave. Put 3 TBSP of chicken soup mixture in each tortilla. Roll tortillas and put in glass dish. Spread the remaining mixture over the top of the tortillas. Spread the cheddar cheese over the top.

My plate above is an enchilada with salsa on top, corn tortilla chips, and corn. A special bonus for you, since I am counting calories, below is the calorie count for this plate.
Enchilada- 345 calories
Salsa (3 TBSP)- 15 calories
Corn (1/2 C)- 90 calories
6 corn tortilla chips- 87 calories
Total: 557 calories

St. Patrick's Day Menu Ideas

Even though I don't do much to celebrate St. Patrick's Day, I make the same Irish themed dinner every year. I make a yummy Reuben sandwich, I got this recipe on simplifysupper.com, I am also posting pictures, I feel like it is easy to explain the "wrapping" of the sandwich in pictures.

Reuben Sandwich:
1 Loaf frozen bread dough, thawed. (We like to use our pizza dough recipe.)
1/2 cup Thousand Island Dressing
1/2 pound sliced corned beef (Sometimes we use pastrami or half and half is good too.)
8 slices Swiss cheese (Honestly, I only ever use 4, cuts down on the calories.)
1/2 cup sauerkraut

Thaw frozen bread dough per package instructions. Roll out dough until it is 1/4 to 1/2 inch thick. Place on top of a cookie sheet. (I ALWAYS use parchment paper, you will see why later.)
Spread the Thousand Island dressing down the center making a strip about 3 inches wide. (Then cut tiny slits on both sides of the dough.)
Add corned beef, cheese, and sauerkraut. (As you can see we cut the Swiss in half and place it on. We also only do sauerkraut on half the sandwich, because not everyone likes it.)
Fold up the sides of the dough and press to seal. (This is the main reason I included the pictures, I think that description could be confusing if you didn't know to cut the slits in the sides.)
Bake according to dough package instructions, generally325 degrees for 30-35 minutes or until golden brown. Slice and serve hot. (This picture explains why I use the parchment paper, sometimes, most times, the dressing seeps out a bit, the paper makes clean up easier.)
I am super excited to eat these Thursday, they are so yummy! I also serve potato chips (the Irish love their potatoes), peas (cause they are green), and this year I am adding rainbow jello. I usually serve sorbet fizzes as a drink/dessert, they are just 7UP with lime sorbet.

Do you have any St. Patrick's Day traditions? What do you serve for dinner that day?

March Madness!!

I love March for a lot of reasons. It is the light at the end of the winter tunnel and we get some warm days thrown in with the crazy Spring weather. One of my favorite things about March though is March Madness and NCAA basketball. I grew up in a household where sports was on 24/7. My Dad and 3 brothers all are HUGE sports fans, they have played and watch lots of different sports. I have one brother that works part time for ESPN and another brother that was a sports and UFC anchor for years. I don't regularly watch college basketball, but the NCAA tournament games are so exciting and fun to watch and it has been a tradition in our family for years to fill out brackets. It started with my brother Ryan, the sports anchor, he INSISTED that EVERYONE fill out a bracket, including his children. As soon as they were old enough (about 2) to participate, he would show them a picture of the teams logo and have them pick which one they wanted to win. Ryan was killed in a car accident on May 31, 2006, but every March I can't help but think of him and his tradition, and we have carried it on ever since. My son isn't old enough this year, but next year he will definitely be choosing a bracket. My nieces and nephews are older now and really get into it. They have such a fun time picking teams and seeing how many of their teams are winning. Most of the brackets are done online now, but I have found a simple way to include the younger kids in the bracket fun.

I print out the teams logo, use a little bit of double stick tape, and attach it to a Popsicle stick. I show 2 Popsicle sticks and have them choose which one they want to win.

We usually post the brackets and highlight the winning teams for them to see. I don't know what it is about logos on Popsicle sticks that is so fun to play with afterward, but they always love them!

I use the pictures below, it has most of the teams. It may seem cheesy, but it is a really fun tradition in our family.
It all starts next week, and we always have nights to sit and cheer on our beloved Utes. I usually make a fun snack, I thought I would share a quick recipe for some yummy popcorn.

Cheesy Barbecue Popcorn

2 TBSP melted butter
1/2 TSP chili powder
1/2 TSP garlic salt
1/4 TSP onion powder
8 cups popped corn
1/4 cup grated Parmesan

Combine butter and seasonings; mix in popcorn until well coated. Sprinkle with cheese, stir well. Serve immediately or store in airtight container.

Do you celebrate March Madness at your house?

The Bebe Shower: Menu & Favors

Just thinking about this post is making my mouth water, the food at the shower was so good! We were presented with somewhat of a challenge when we first put together our menu because the guest of honor has gestational diabetes. Not only did we have to think sugar free, but one key point to focus on was making sure there was a good carb to protein balance. Thankfully, my sister in law who helped me prepare the menu (she also graciously let me use her house to host the shower) had some great ideas to make the menu diabetic friendly, while still making it DELICIOUS!

My sister in law made scones that were to die for! She made cranberry pecan scones and served them with orange honey butter, and plain scones and served them with home made raspberry jam, are you hungry yet?? Here they are in all their glory...We also served crust-less mini quiches, avocado dip with veggies, tea sandwiches, and sugar free hot chocolate. I have never made quiche before, but since we were trying to minimize carbs, I found this crust-less recipe that was SO SIMPLE. They were so fun to make and so delish---I think I am going to have to make them as a Christmas Morning tradition, I think they would be lots of fun!

For dessert my sister in law pulled out all the stops for 2 amazing SUGAR FREE cakes. You would've never known they were sugar free, they were heavenly. She did a poke cake with a sugar free cake mix, sugar free jello, sugar free pie toppings, and sugar free whipped cream. I didn't get a picture of the finished product, but here it is ready for topping...
She also made a sugar free pecan pudding cake....YUM.
For the favors I didn't go the sugar free route, but I told my sweet SIL and Mom to be to save this one a couple weeks until after the babe is born. I used my mustache sucker molds to make the fun suckers. I bought some Guittard melting chocolate, and had all the rest of the supplies I needed on hand.

At first I didn't know the best method to melt my chocolate. I tried putting it in one of my glass measuring cups and then melting it on defrost, stirring after every minute. This was a giant PAIN. Then my light bulb clicked and I remembered I have a double boiler for just such an occasion. SO EASY. I suggest that method whenever you are melting chocolate. I just melted the chocolate, poured it into the molds, set them in the freezer for 5 minutes, and they set right up. I think they turned out perfect!
I put them in some cello bags, tied them with baker's twine, and added a tag I made with Photoshop and my Silhouette.
I love how they turned out! Thursday I will wrap up my baby shower posts with the games we played at the shower, they were so fun, stay tuned!

Here are the links to the recipes I used as well as the recipe for the tea sandwiches:
1. Scone recipe is found in this cookbook.

Tea Sandwiches
6 oz cream cheese at room temp
1/4 cup roasted red peppers
Juice from 1 lemon
Cucumbers sliced very thin
Combine cream cheese, peppers, and lemon juice in a food processor. Apply a thin layer to each slice of the bread of your choice (I used pumpernickel, the flavors goes well together). Add cucumbers to one slice of the bread.
I wanted to cut them into the shape of baby onesies, but my slices were too small. Oh well!

Easy Super Bowl Appetizer

This week has been CRAZY!! I am running in circles trying to get everything ready for the baby shower on Friday. I can't wait, I think it is going to be tons of fun. I am eagerly awaiting the weekend with the shower Friday, a baptism Saturday, and Super Bowl Sunday! I love the Super Bowl, I grew up in a sports family and have always enjoyed getting together with family for food, football, and fun! Even though my Patriots didn't make it this year, I still enjoy watching. I thought I would share the recipe for the dip I will be taking to my Super Bowl party. It is SO yummy, but watch out, it is not low fat!! My favorite part is the good ol' Crockpot does most of the work, you do have to have precooked chicken though.
Buffalo Chicken Dip

In the Crockpot add:
COOKED chicken, either 4 shredded chicken breasts or canned chicken
TWO- 8 ounce packages of cream cheese
1 Cup ranch or bleu cheese dressing
1/3 Cup shredded cheese
3/4 Cup Franks Original Hot Sauce (Or if you love spicy, do the Buffalo style)
Cook on low heat for 1 to 2 hours stirring occasionally until all ingredients are mixed throughly. Serve with tortilla chips and celery.

ENJOY!