Showing posts with label parties. Show all posts

A Very Hungry Birthday!

Saturday was my son's second birthday party and he had a blast!  I must admit throwing a party while 36 weeks pregnant wore me right out!  Even though we just invited family, my husband and I have very large families, so there were quite a bit of people there.  We pretty much DIY'd everything and it all turned out great!

For the food we ate the same things the caterpillar did in the book, sausages (lil' smokies), a leaf (spinach salad), strawberries, watermelon, apples, swiss cheese, salami, and pickles.  Sounds kind of like a weird combo, but it was really good.  We had lemon water also.


I used Photoshop to make up food cards.


My husband and I tag teamed the cake.  He is the artistic one, so he did all the sculpting and the fondant.  One of his co-workers made the fondant for another cake and gave us her extra, super nice!  I made home made funfetti cupcakes using this recipe.  SO GOOD.
I used my Grandma's home made butter cream frosting recipe for the icing, I think it turned out cute!
 A friend had given me a caterpillar cupcake stand, he was fun!
A few months back at Target they were clearancing out Very Hungry Caterpillar plates, napkins, and cups, I think they were like $.50-$.75 per pack, score!

I made a fun banner using my Silhouette.
 We made a balloon caterpillar, all the kids got a kick out of it!
 We made fringey streamers for decor, cheap and cute! I also used this fun washi tape to hang them.


As the kids arrived we had them color a large caterpillar mural.  My husband printed it off at work, and we used washable crayons of course!  Here is the before.....
 And the after....
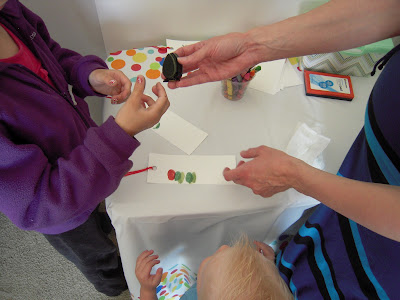
We had everyone make caterpillar bookmarks.  I got the idea from this cute blog.


I was trying to think of 2 year old friendly games to play and came up with this "Feed The Very Hungry Caterpillar" game.  We bought a giant poster board and used our projector to draw the images onto it.  We colored it in with markers.  I used some of our play food that he ate in the book to "feed him".  My son LOVED it, and so did the other kids.

For the favors I was out of ideas, when I saw this cute idea on Pinterest for Butterfly snack packs. (My Pinterest link doesn't have the original source, sorry!)  My son's favorite treat is Marshmallows, I thought the fruit ones would be nice and colorful and had forgot how yummy they are!  I also did Goldfish crackers for the younger kids.  I paired them up with some Very Hungry Caterpillar stickers that were also on clearance at Target.
Though I was absolutely exhausted by the end, it was worth it.  My cute boy has been saying "Happy Birthday Party" ever since!

A Very Hungry Birthday!---Invitations

Hi, remember me, SueAnn, yes I am still alive!  I know I haven't posted in ages, but this pregnancy has been really rough on me.  Just 4 short weeks and she'll be here, I can't believe it!  I do have lots of projects for my husband to do and me to post, HA!

Tomorrow is my son's SECOND birthday.  I really cannot believe he is 2!  Since I knew I would be throwing his party so pregnant, I have done a little at a time, during naps and at night (before 10pm), and I think it is going to turn out cute!  I think this party has been easier to plan than the last, maybe because I did break it up so much, instead of doing a ton at the end.  It was low cost too!

One of his favorite books currently is The Very Hungry Caterpillar, so I thought that would be the perfect theme.  A friend of mine threw her son's first birthday 6 months ago and also did The Very Hungry Caterpillar theme.  The invitations she did we so cute, I asked if she would mind if I stole her idea!  She gave me the go ahead and told me she had originally seen the idea at Pottery Barn.

The invitations are small Mason jars, with a caterpillar and a leaf inside.  I did multi colored paper on the tops and wrote the kids names.  I mainly just invited family, since I knew I would be too tired to invite too many people.


I wanted to type up the invites on the leaves, but they ended up being too small, so I hand wrote them.  On one side I wrote "You're Invited...", then wrote all the details on the other side.  I used my Silhouette to cut the leaves and the eyes of the caterpillar.  They were really quick to put together, a dozen only took me about an hour.  I just hot glued the pom poms together and then threw everything into the jar.  Each invitation cost less than $1.00.  My son's cousins thought they were great and have loved playing with the caterpillar.  My son isn't the most gentle, he ripped the eyes off of his. :)

The party is this Saturday, I am super excited, I think he will just love it!  I will post all the details next week, stay tuned!

Sugar, Spice, and Everything Nice

A few weeks ago I helped with a baby shower for a neighbor. The neighborhood did it pot luck style and there was some yummy food! I made ham & cheese sliders, my MIL had made them for a shower a year ago, they are so yummy! There wasn't a real theme or anything, but the Mom to be said she was doing her nursery in red, brown, and cream, so I made a small banner in those colors for above the food table.
I also made this yummy punch. I got the recipe from Pinterest of course!
I was also in charge of the favors. Ever since I did this post, I have been dying to make some lips! I thought they would work for favors since it was a baby shower for a girl! They were a piece of cake, my Silhouette did all the work, I slid in the suckers and they were done.
Here is one close up, I will totally be using these as Valentine's some day.
I also found some cinnamon lips to go with the favors.
I made the Mom to be a small diaper cake, the flower is actually a headband for the sweet babe. I didn't use all the diapers, so I tied a ribbon around the rest.
It was a fun summer night to enjoy my neighbors, can't wait to meet the little lady in a few weeks!

50 Golden Years

Thursday marks my parents 50th wedding anniversary! 50 golden years is a big deal, so a few weeks ago we through them a small party of family and a few friends to celebrate. We had to do it before school started so everyone could attend. I think it turned out well. I started the planning process at the beginning of the year and wasn't feeling super creative. Thankfully there are plenty of creative people out there sharing the ideas on the world wide web. The "theme" was gold, since it was a golden anniversary. The "50" photo collage was Martha's idea, that woman is amazing. I decided to do a mix of color and b/w photos, mainly because I was lazy and didn't want to change them.


My niece made this cute arraignment from pie tins. Isn't it so cute!! You can find the full tutorial here.

I saw this idea last year on Ohdeedoh and bookmarked it, I knew I would want to use it and this was the perfect occasion. Instead of a guestbook, we had everyone "leaf" their thumbprint. We bought a foam board from the dollar store and cut it to 16x20, my husband the artist drew the tree, and my sister in law made the names and date in vinyl. Here is the before.....


And the after. Once it was full we framed it and my parents now have it hanging in their home.

We had a small luncheon with sandwiches, salads, and desserts. I found this fun gold star edible glitter at Hobby Lobby. It was way cute, but since I made the cupcakes the day before it bled a little and wasn't as gold. Lesson learned for next time.

One of my other sister in laws made the cake. SHE MADE THIS.


It was so delicious, yummy red velvet, and an absolutely stunning cake.


I did a DIY favor bar where guests could take a little scoop of gold with them.


We put our projector to good use and my brother made a slide show of the pictures throughout the years. It was great, he had the photos set to songs from the decade they were in. I loved it.

For the centerpieces I found some wood letters at Hobby Lobby, with a little gold paint, and some super glue, they turned out really cute. We added "50" confetti throughout the tables.

These tissue pomanders were fun and inexpensive, but I am not going to lie, they took awhile to make. My sisters, sister in laws, and nieces had a craft night and it took all of us a good 4 hours to make 12 of these. We found the candelabras at the dollar store, and did 2 different sized to signify my Mom and Dad.

Overall it was a great party, it is always fun to get together with family, visit, and eat don't you think?

O is for Ohdeedoh

I know, I know, we have totally been blog slackers lately. I blame summer and all of it's wonderful outdoor fun. We have more posts coming, promise! I cannot tell you how excited I was to receive an email telling me that the Cookie Monster Party would be featured today on Ohdeedoh! I have told you about my love of Ohdeedoh before, head over and check it out!

Golden Invitations

We have been slacking a bit on the posts lately, I know. It is summer time though and that means lots of fun in the sun with our kiddos! Posts might be a little thin this summer, but I think that is just the way summer goes. I am in party planning mode again, these days it seems I am always in party mode. My amazing parents are celebrating their golden anniversary this August, 50 years, how amazing is that? We are throwing a small party (per my Mother's request) at a church in Southern Utah. It should be fun, we are going to get a family photo taken, which seems to not happen very often anymore with everyone so spread out. Due to financial constraints I am not going as all out as I want to, but I am still trying to make it nice on a small budget. I think that should be my tag line for parties, LOL. I made some simple invitations using Photoshop Elements and I think they turned out nice. I had them printed out at Costco, they ended up being super cheap, I think I spent about $8.

Of course this copy doesn't have the real address, sorry if you wanted to party crash! :) Aren't my parents so cute? I love them so much and can't wait to celebrate their special anniversary!

Summer Activity List

The weather may not think so, but I do, Summer is here! I have been working on invitations for my parents 50th wedding anniversary in August, and that is about all I have accomplished this week. I came across this fabulous list while pinning, and had to share it with you all. It is from Counting On Me. It is a great list I hope to do lots of these activities this summer. Enjoy and happy weekend!!

P is for Party....

Although it didn't go just according to plan, my son's first birthday still turned out pretty spectacular I'd say. The weather didn't cooperate, but my Mother in law was nice enough to let us clean her basement the night before, so we could have the party there. I felt bad, because I was planning it outdoors I invited a ton of people, but she was so nice to help make it great! I know I went overboard, but my son loved it! He was pointing to all the decorations and balloons with the biggest smile on his face! It was all worth it.

My son loves to read and he especially loves his Sesame Street books that I picked up at the dollar spot over at Target. Between his love of those books and a picture of my younger brother's birthday from 1985, I had my theme, Cookie Monster. Well Cookie Monster, plus my added theme, "use what you have."

In that photo from 1985, my Mother had made an amazing Cookie Monster Cake, I tried to copy it. Here is a photo of the cake, that I made, MYSELF, from scratch, and decorated it MYSELF too, the frosting from scratch as well. I am really proud of myself, I am not artistic whatsoever.

Here is the present table, where I hung his "monthly" photos. A couple years ago I was at IKEA and they were blowing out wrapping paper at $.25 a roll, I pick up a bunch of rolls, the same pattern, but different colors. The blue was PERFECT for a Cookie Monster theme, so perfect in fact that we used it as a backdrop for our "photo booth."
Since I already had a bunch of scrapbook paper in different shades of blue, I just went with it. I really didn't have money to spend. I found this cute paper hat template HERE. We brought over my son's Cookie Monster stuffed animal, he was a perfect addition to the party.

You may remember my frames from my bebe shower. The "cookie jars" were my baby food jars with a little Cookie Krisp cereal and my little Cookie Monster figurines were from the dollar spot at Target.

I used my Silhouette for everything in this party, it was so fast, and I love how it turned out.
I made the smash cake too!
I used different jars from my pantry, even though they were different shapes and sizes, I think they worked out well. I added some ribbon and twine to jazz them up a bit. The large jar I found at Tai Pan Trading for a steal at $7.97! I added a fun Cookie Monster sticker from Michael's to the front. I made all of the cookies from scratch, well except the Oreos, those were my husband's request, we never have them at home.
Planning early is a must for me! I saved so much money by doing so. I knew I wanted "milk bottles", but wasn't going to spend money on them. So, in January I asked coworkers to give me any old Starbucks bottles they were going to throw away. I washed them and spray painted the lids and "voila" milk bottles! I got the idea for the Cookie Monster cups from Hostess with the Mostess.
Some really inexpensive decor, tissue paper pom poms, and a felt circle garland.
I used my son's "M" from his room, it worked perfect.
For the kid's we had a game to guess how many cookies are in the cookie jar. The prize was Cookie Monster book, Cookie Monster stamp, and Cookie Monster figure, all from the dollar spot at Target.
I really scored with the favors, and didn't spent a cent of my own money. Let me explain. My husband sold some of his old text books to Amazon, so we had some online credit. I purchased these letter and number cookie cutters with the credit, so they were free! I used bags I already had from other favors, and leftover ribbon. I cut out the tags with the Silhouette and had them say "This party was brought to you by the letter "M" and the number 1." I printed out some recipes for sugar cookies to go along with them and placed them in a milk crate my Mother in law had.
We set up a coloring table for the kids with coloring pages I printed off the PBS kids website. We used an elegant paper table cloth, so we didn't have to worry about crayon on the nice ones. We had foam stickers, stamps, and Sesame Street stickers.
Overall, everyone had fun, and it turned out great, even on a budget. I think I spent around $50 total, which I felt was really reasonable for a party of 50 people. You only turn 1 once!